Search This Blog

Wednesday, December 8, 2010

Pumpkin Cheesecake

This cake/pie is exactly what would happen if cheesecake and pumpkin pie got together and had a kid.  It’s DELICIOUS.  This is definitely more of a cheesecake than a pumpkin pie and it has to be treated as such.  Although the recipe directions don’t mention anything about a water bath I would highly recommend using one.  For those of you that don’t know a water bath is, it’s when you bake the cheesecake in the oven inside of an extra pan filled with water (about ½ way up the cheesecake pan).  This method helps to keep moisture in the air of the oven, provides for a more gentle heat and helps the cheesecake bake evenly.  If you do not use a water bath the most common problem is that the outside of your cheesecake bakes faster than the inside which is the #1 cause for cracking and drooping.  The only issue you may face with the water bath is that water seeps in and makes your crust soggy (which is exactly what happened to me).  The good news is that it usually dries out and all is ok. 


1st things 1st…make the crust.  This recipe has a gingersnap crust (of course I used Sweetzel’s gingersnaps) and the original recipe called for hazelnuts but I decided that pecans would be better so that’s what I used.  Dont forget to butter and flour your pan (its very important in this case).  After you grind your ingredients, pres them into your prepared pan. 
                                                                                                   

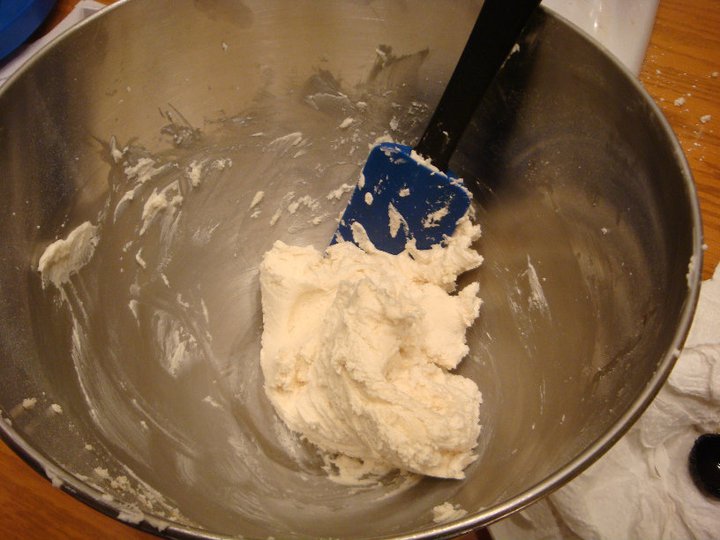
The next step is to mix your batter until smooth and pour over crust.
 
Now your ready to set up your water bath.  I find that it is much easier to place the pan the water is going into (with the cheesecake inside of it) in the oven before adding the water.  As you can see see I wrapped the pan in foil before I even poured the batter in.
Let this bake for about an hour and a half.  It is hard to tell when a cheesecake is done.  I always check to see if the center is set and usually give the pan a shake.  If the cheesecake uniformly wobbles it should be set all the way through.  The key is to refridgerate overnight.

The most difficult part of this whole process (for me at least) is removing the cheesecake from its pan.  Honestly, I have no good tricks for you....aside from keep your fingers crossed and say a quick prayer.  I made it all the way through the baking process without any cracks until I went to remove it from its pan.  Luckily, I have some tricks up my sleeve and covered the cracks with candied pecans.
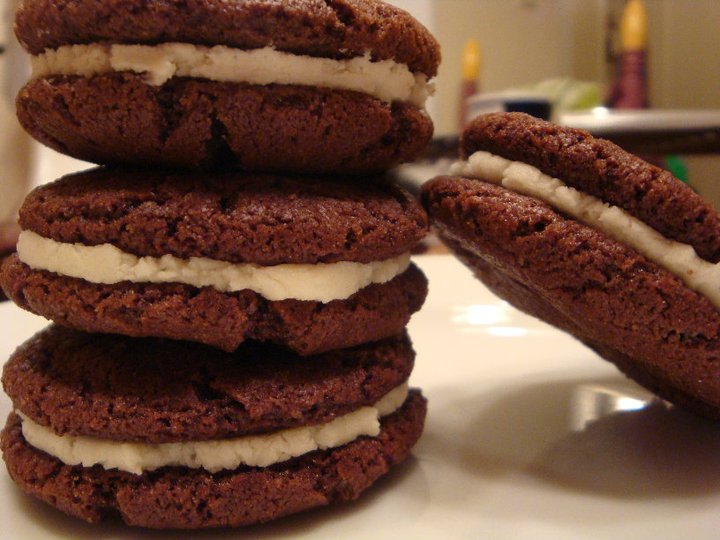
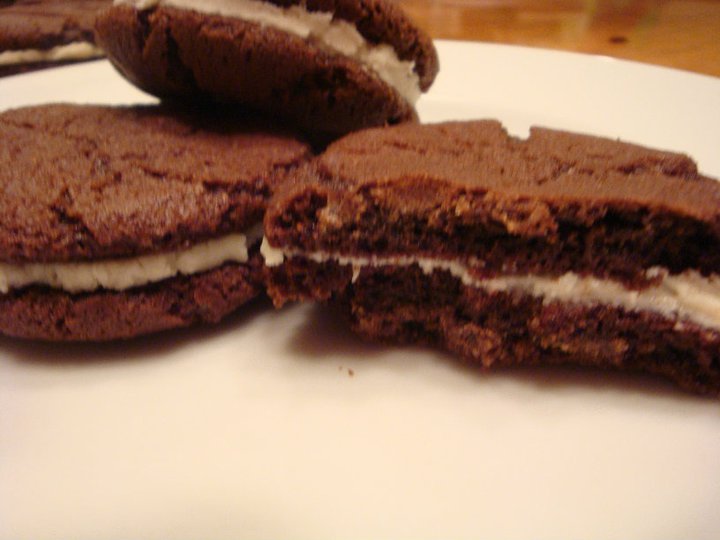
Enjoy!

1 1/2 cups gingersnap cookie crumbs
3/4 cup ground pecans
3 tablespoons brown sugar
6 tablespoons unsalted butter, melted
3 (8 ounce) packages cream cheese, softened
1 cup brown sugar
1 1/2 cups canned solid pack pumpkin
1/2 cup heavy cream
1/3 cup maple syrup
1 tablespoon vanilla extract
3/4 teaspoon ground cinnamon
1/2 teaspoon ground allspice
4 eggs

1.       Preheat oven to 325 degrees F (165 degrees C). Grease and flour a 9 inch springform   pan.
2.       Using a fork, combine gingersnaps, pecans, 3 tablespoons brown sugar and melted butter. Press mixture onto the bottom and two inches up the sides of the pan to form the crust.
3.       With an electric mixer, beat cream cheese and brown sugar until light and fluffy. Stir in the pumpkin. Mix in the cream, maple syrup, cinnamon, allspice and vanilla. Beat in the eggs, one at a time, mixing until smooth.
4.       Pour batter into prepared crust. Bake in the preheated oven for 90 minutes, or until center of cheesecake is set. Allow to cool in pan for 30 minutes, then refrigerate overnight.


Tuesday, December 7, 2010

GingerSNAPS

OMG I have found my new favorite thing.  As many of you know I am a Sweetzel’s gingersnap junkie.  Seriously, I have an addiction and it’s not funny.  I literally don’t go down the cookie aisle of the supermarket because if I see that black and orange box I will not be able to say no.  Anyways… these gingersnaps are circling the edge of being better (if that’s even possible).  SOOO good.  I made them on a whim and took them to Thanksgiving dinner and they were a huge hit (I also ate like a dozen of them before we left the house...big hit with me too).  All I can say is OMG.  You can bet your tush they will be making an appearance on my holiday cookie trays this year. 

The recipe is a pretty standard cookie recipe; the only extra step is rolling the portioned dough balls in sugar before placing them on sheet pans. 


Fresh from the oven


See...I just couldn't help myself....


Absolutely AMAZING


Ingredients

  • 2 cups all-purpose flour
  • 2 teaspoons baking soda
  • 1/2 teaspoon salt
  • 1 teaspoon ground cinnamon
  • 2 teaspoons ground ginger
  • 1/2 teaspoon ground cloves
  • 12 tablespoons (1 1/2 sticks) unsalted butter
  • 1 cup sugar
  • 1 large egg
  • 1/4 cup molasses
  • 1/2 cup sugar in a shallow bowl, for finishing

Directions

Set racks in the upper and lower thirds of the oven and preheat to 350 degrees. Combine the flour, baking soda, salt, and spices in a bowl; stir well to mix. In the bowl of a standing electric mixer fitted with the paddle attachment, beat together on medium speed the butter and sugar for about 5 minutes until very light, fluffy and whitened. Add the egg and continue beating until smooth. Lower speed and beat in half the dry ingredients, then the molasses. Stop the mixer and scrape down bowl and beater. Beat in the remaining dry ingredients. Remove bowl from mixer and use a large rubber spatula to finish mixing the dough. Use a small ice cream scoop to scoop out 1-inch diameter pieces of dough. Roll into balls between the palms of your the hands, then roll in the sugar. Place the balls of dough on the prepared pans leaving about 3 inches all around each, to allow for spreading. Bake the cookies for about 15 to 20 minutes, or until they have spread, the surface has crackled, and they are firm to the touch. Cool on racks and ENJOY….Lord knows I did J

Vanilla Cupcakes with Vanilla Frosting

Vanilla Cupcakes

I know, I know, I’ve been gone for a really long time!  Sorry!  Things have been pretty crazy lately but the good news is that I have a ton of new recipes to share (I’ve been stockpiling).  This vanilla cake/icing recipe is my new go to.  It is delicious and makes the perfect birthday cake and of course great cupcakes.  The pictures below are from Halloween (obviously) but you can be sure I am going to readapt them for the holidays (coming soon I PROMISE).  The recipe is super easy but it is a little different that what you may be used to when it comes to mixing cakes. 

The first step is to get all of your ingredients together in the bowl of your mixer.  Turn your mixer on low and let it combine the ingredients for you.  After you give them a good mix you want to add your COLD butter (cut into ½ inch pieces) kind of like what you would do for a pie crust or a biscuit.  Just allow the mixer to run long enough for coat the butter chunks with the dry ingredients.


After you get your butter coated, whisk together your eggs, milk and vanilla in a separate bowl until combined and add to butter/dry ingredient mixture in three stages, scraping the sides of the bowl in between additions.  The batter you end you end up with WILL BE LUMPY and that’s OK!


The next step is to divide the batter into prepared pans (be it either cupcake or other) and bake.  The cake comes out moist and buttery....its just so good.  The icing is also really simple to make its just butter, powdered sugar, vanilla and a little milk.  It comes together fast and is also easy to work with. 

Here are some pictures of my finished product dressed up for Halloween

Just in case you're wondering...The graves themselves are sugar cookies that I wrote RIP on in black icing, the little ghosts are just marshmallow that I stuck together and the "dirt" is ground oreos.


Billy's Vanilla Cupcakes

1 3/4 cups cake flour, not self-rising
1 1/4 cups unbleached all-purpose flour
2 cups sugar
1 tablespoon baking powder
3/4 teaspoon salt
1 cup (2 sticks) unsalted butter, cut into 1-inch cubes
4 large eggs
1 cup whole milk
1 teaspoon pure vanilla extract

1. Preheat oven to 325°. Line cupcake pans with paper liners; set aside. In the bowl of an electric mixer fitted with the paddle attachment, combine flours, sugar, baking powder, and salt; mix on low speed until combined. Add butter, mixing until just coated with flour.

2. In a large glass measuring cup, whisk together eggs, milk, and vanilla. With mixer on medium speed, add wet ingredients in 3 parts, scraping down sides of bowl before each addition; beat until ingredients are incorporated but do not overbeat.

3. Divide batter evenly among liners, filling about two-thirds full. Bake, rotating pan halfway through, until a cake tester inserted in the center comes out clean, 17 to 20 minutes.

4. Transfer to a wire rack to cool completely. Repeat process with remaining batter. Once cupcakes have cooled, use a small offset spatula to frost tops of each cupcake. Decorate with sprinkles, if desired. Serve at room temperature.

Frosting
1 cup (2 sticks) unsalted butter, room temperature
6 to 8 cups confectioners' sugar
1/2 cup milk
1 teaspoon pure vanilla extract

1. In the bowl of an electric mixer fitted with the paddle attachment, cream butter until smooth and creamy, 2 to 3 minutes. With mixer on low speed, add 6 cups sugar, milk, and vanilla; mix until light and fluffy. If necessary, gradually add remaining 2 cups sugar to reach desired consistency.


Tuesday, October 26, 2010

Stuff I've Been Working On

I feel like I've been away for a looooong time!  The good news is that I have been very busy baking my tush off.  Here are some of the things I've been working on!


Sugar cookies decorated as sugar skulls!  I totally <3 them!


Phillies and Philly Phanatic cupcakes and cookies
(I hope they weren't the cause of our terrible luck)

EAGLES Cupcakes!


A Friend's B-day Cake

Stay tuned for more Halloween themed desserts!

Pumpkin Cake with Cinnamon Cream Chesse Frosting

Pumpkin Cake with Cinnamon Cream Cheese Icing
Tis the season for spicy cinnamony things and I am in all my glory!  I love this time of year!  This pumpkin cake is AMAZING, its everything I want when I think of fall flavors.  I served little “naked muffins” (without icing) at work for a breakfast treat and they were a huge hit.  I see this pumpkin batter with raisins and nuts baked as muffins in my very near future (perfect with a nice cup of coffee).  When you add the cinnamon cream cheese icing this recipe becomes OUTRAGEOUS. 


These were seriosuly good without the frosting BUT you will not regret making the frosting.  I could have sat there and eaten it with a spoon...thats how good it is.


I topped these off with a little sprinkle of cinnamon just to add some personalily.  Seriously delicious!


Pumpkin Cupcakes W/ Cinnamon Cream Cheese Frosting

·    2 cups all-purpose flour
·    1 teaspoon baking soda
·    1 teaspoon baking powder
·    1 teaspoon salt
·    1 teaspoon ground cinnamon
·    1 teaspoon ground ginger
·    1/4 teaspoon freshly grated nutmeg
·    1/4 teaspoon ground allspice
·    1 cup packed light-brown sugar
·    1 cup granulated sugar
·    1 cup (2 sticks) unsalted butter, melted and cooled
·    4 large eggs, lightly beaten
·    1 can (15 ounces) pumpkin puree

Directions

1. Preheat oven to 350 degrees. Line cupcake pans with paper liners; set aside. In a medium bowl, whisk together flour, baking soda, baking powder, salt, cinnamon, ginger, nutmeg, and allspice; set aside.
2. In a large bowl, whisk together, brown sugar, granulated sugar, butter, and eggs. Add dry ingredients, and whisk until smooth. Whisk in pumpkin puree.
3. Divide batter evenly among liners, filling each about halfway. Bake until tops spring back when touched, and a cake tester inserted in the center comes out clean, 20 to 25 minutes, rotating pans once if needed. Transfer to a wire rack; let cool completely.

Cinnamon Cream Cheese Icing
·  (8 ounce) package reduced-fat cream cheese, at room temperature
·  4 tablespoons butter, room temperature
·  3 cups confectioners' sugar, sifted
·  1 teaspoon ground cinnamon, if you prefer (or more)
1.      1 In a medium bowl, cream together the cream cheese and butter until creamy. Then gradually stir in the confectioners' sugar and cinnamon.
2.      2 Frost cake or cupcakes and let frosting "set" for 20 minutes on counter or in the fridge.


Homemade Milanos

Milanos

I LOVED Milanos as a kid but kind of grew out of them as I got older.  After making them at home I have a whole new appreciation for them.  These are surprisingly easy to make if you have the right tools.  The cookie batter comes together really quickly and the “filling” is just melted semi-sweet chocolate chips.  The most labor intensive part is matching cookies and sandwiching them together.  This is one of those cookies you could just eat and eat and eat. 


 After getting your batter together pipe out inch long cookies on to your sheet pan.  Piping the cookies gives you a much better chance of having matching cookies after they're baked.


After your cookies have baked and cooled, start matching your cookies up into pairs.


After you have your cookies pairs all ready to go start smearing and smushing.


Just let the chocolate dry (at least a little) and ENJOY!


Ingredients

12 tablespoons butter, softened
2 1/2 cups powdered sugar
7/8 cup egg whites (from about 6 eggs)
2 tablespoons vanilla extract
1 1/2 cups flour
8 ounces dark chocolate chips


Directions
  1. Cream the butter with a paddle attachment then mix in the sugar.
  2. Add the egg whites gradually and then mix in the vanilla and lemon zest.
  3. Add the flour and mix until just incorporated.
  4. With a small (1/4-inch) plain tip, pipe 1-inch sections of batter onto a parchment-lined sheet pan, spacing them 2 inches apart as they spread. Or spray a muffin lined tin with oil and pipe a thin amount of cookie into each muffin tin. Just cover the bottom of a muffin cup.
  5. Bake in a preheated 350 degree oven for 10 minutes or until light golden brown around the edges. Let cool on the pan.
  6. Melt chocolate chips in microwave or over a double boiler.  Spread a thin amount of the filling onto the flat side of a cookie while the filling is still soft and press the flat side of a second cookie on top. Repeat with the remainder of the cookies.

Monday, October 11, 2010

Homemade Oreos

Oreos

Yay homemade oreos!!  Ok these don’t really taste like oreos at all but they are delicious!  They are much richer than the original as well as much more flavorful.  I should probably just call them chocolate sandwich cookies but that is so boring so I’m sticking with homemade oreos.

These are pretty easy to make, just mix the dough and put on a cookie sheet.  I used a piping bag so I could get more evenly sized cookies.  The dough is really dense so it takes some elbow grease to get it out of the piping bag but I still think it was faster (and easier) than scooping the cookies with a spoon. 


After baking the cookies let them cool and make your cream. 


Once your cookies are cooled and your cream is made, match your cookies up with other cookies of similar size.  Pipe the cream onto one of the cookies and sandwich its matching cookie on top.  You can kind of mush them together until you get the cream to spread to the outside of the “sandwich”. 
YUM!

Homemade Oreos

For the chocolate wafers:1 1/4 cups all-purpose flour
1/2 cup unsweetened Dutch process cocoa
1 teaspoon baking soda
1/4 teaspoon baking powder
1/4 teaspoon salt
1 to 1 1/2 cups sugar [see recipe note]
1/2 cup plus 2 tablespoons (1 1/4 sticks) room-temperature, unsalted butter
1 large egg

For the filling:
1/4 cup (1/2 stick) room-temperature, unsalted butter
1/4 cup vegetable shortening
2 cups sifted confectioners’ sugar
2 teaspoons vanilla extract

  1. Preheat to 375°F.
  2. In the bowl of an electric mixer, thoroughly mix the flour, cocoa, baking soda and powder, salt, and sugar. While pulsing, or on low speed, add the butter, and then the egg. Mix until dough comes together in a mass.
  3. Take rounded teaspoons of batter and place on a parchment paper-lined baking sheet approximately two inches apart. With moistened hands, slightly flatten the dough. Bake for 9 minutes, rotating once for even baking. Set baking sheets on a rack to cool.
  4. To make the cream, place butter and shortening in a mixing bowl, and at low speed, gradually beat in the sugar and vanilla. Turn the mixer on high and beat for 2 to 3 minutes until filling is light and fluffy.
To assemble the cookies, in a pastry bag pipe teaspoon-size blobs of cream into the center of one cookie. Place another cookie, equal in size to the first, on top of the cream. Lightly press, to work the filling evenly to the outsides of the cookie. Continue this process until all the cookies have been sandwiched with cream.

Tuesday, September 28, 2010

Yellow Cake With Chocolate Frosting

My Very 1st Birthday Cake!!

Woo Hoo!  How exciting is this??  Yes, I have made many cakes, cookies, pies and cupcakes but I have never EVER made a birthday cake before!  For this little project I really wasn't all that concerned with the actual cake or icing, although, I am on a search for a good yellow cake/chocolate icing combo (not sure this one is it BUT it certainly wasn't bad).  This was really more about assembling a layer cake.  The cake recipe yields three 9 inch cakes so I decided to only make a double layer cake and use the last layer as practice.  After baking all three cakes I froze them so cutting them and crumb coating them would be easier.


After the cakes came out of the freezer, I leveled off the two layers for  the large cake and leveled off and cut 4 small rounds of of the last layer so I could practice my icing skills on 2 other (much smaller) cakes.

After I cut the cakes I brushed them with some vanilla simple syrup which I made by boiling the rest of my vanilla bean (from the vanilla wafer recipe) and a 1/2 cup sugar and a 1/2 cup water      just until the sugar is dissolved.  Adding the simple syrup to the cake is a good way to keep the layers moist. 

The next step is to add a small layer of icing to the top of one of the layers and to sandwich the next layer on top.  You do not need to spread the icing all the way to the side and it will kind of smush out when you add your next layer.


After you have your layers together, you want to crumb coat the cake which is where you add a thin layer of icing to seal the crumbs so you don't end up with crumbs in your finished product.


After you get your cake crumb coated, park the cake in the fridge and let the icing set up before adding the next layer of icing. 

When you pull your cake out of the fridge the thin layer of icing should be pretty set making it much easier to finish icing. 

This takes practice!  I had three cakes to practice on and my last one came out LOTS better than my first which was unfortunate since the 1st one I did was the actually b-day cake....oh well...

Here are the finished products...
This is the actual b-day cake (in case you didn't figure that out haha).  Instead of writing on the actual cake I melted white chocolate and wrote the text on some waxed paper with a piping bag.  I DO NOT have nerves of steel and was terrified that I would misspell something or royally mess it up so I took the whimpy way out.


And now for the WAY cuter mini layer cake...


If you guys really want the recipes I used for these cakes I will be glad to give them to you, they were just not my favorite and I'm feeling lazy and don't feel like writing them out (they were not that worth it).

Monday, September 27, 2010

Vanilla Wafers

Vanilla Wafers

I was on a quest to recreate the classic Nilla Wafer (which is one of my favorites).  While I can't say these cookies taste anything like the original I do dare to say they are BETTER.  This is the kind of cookie you start eating and don't stop until you are left with nothing but crumbs.  They are seriously DELICIOUS.  Not only are they fabulous they are super easy to make.  The only downside to this recipe is the use of real vanilla which most people don't have on hand and it's also pretty expensive.  I was lucky enough to get some free vanilla beans from school last semester and have been saving them for the right occasion and boy I am glad I did!  This cookie comes together just like any other cookie and then piped onto the cookie sheet for uniformity. 


After getting all of your batter piped onto the cookie sheets they bake for about 15-20 minutes.  Make sure to watch them closely and its always a good idea to rotate your trays during the baking process.  I got lazy with the rotating and burned one of my trays (I ate them anyway haha)


As you can see what you end up with is a thin, crunchy (the good kind of crunchy) cookie marked with the little black flecks that take this cookie from just OK to extra special. 


I brought a gallon sized Ziploc bag filled with these cookies to my office and they were gone within an hour.  These will definitely be placed in my regular cookie rotation, they are seriously THAT GOOD.

Vanilla Wafers
  • 8 tablespoons unsalted butter, softened
  • 1/4teaspoon salt
  • 1 cup sugar
  • 1 vanilla bean, seeds only
  • 1 large egg white
  • 1 ½ teaspoons vanilla extract
  • 1 tablespoon milk
  • 1 1/3 cups AP flour
  • 3/4 teaspoon baking powder
  1. With an electric mixer, cream butter, salt, sugar and vanilla seeds until light.
  2. Beat in egg white until well incorporated, scraping sides and bottom of mixing bowl to insure that all white has been incorporated.
  3. Beat in extract and milk until well incorporated.
  4. Whisk together flour and baking powder and add to butter mixture. Mix just to incorporate, scraping down sides and bottom of mixing bowl to insure that all flour has been incorporated.
  5. Fit a piping bag with a large, plain pastry tip.  Fill bag with about 1/3 of the batter. Holding the filled bag perpendicular to a parchment-lined baking sheet, pipe batter into nickel-sized mounds, about 1 inch apart. To make neat, well-shaped cookies, as you finish piping each round, sweep the pastry tip horizontally off to the side with a slight curving motion. (The cookies should cover 2 to 3 standard baking sheets. Batter will hold for a while after it is piped, so trays can be baked one or two at a time, as your oven allows.)
  6. Bake at 350°F for about 15-20 minutes, until cookies are lightly browned, rotating trays every 5 minutes or so for even coloring. Cool completely before storing. Cookies will keep in an airtight container for at least a week.
  ENJOY!!